Friday, May 22, 2009

These are about 4 feet by 3 feet. Two students are looking into the same large mirror. They are drawing with charcoal on brown wrapping paper. Alec and Sadie are both graduating and going to college next year to study Art. We wish them both all the best.


Another finished mask. Nice job Isabel!

Thursday, May 7, 2009

Another stunning piece by Katie. This is made of silver with a blue sapphire set in a bezel. 

Friday, April 17, 2009


A long process well worth the effort. Multiples may be made very easily. Great job Emma!
Here, the rubber mask is shown on the clay positive, where it was made.

Thursday, April 9, 2009

Kaitlyn finished her mask!  
This mask has copper trim and a wonderful, smooth, finish.
Here is some more progress on the positive clay face. The rubber mask is being applied in layers creating a perfect fit for the makers' face.


Thursday, April 2, 2009

Continuing an earlier project/post.....the clay positives have been fired with a clear glaze.
Black and white photography by Mia C.
Wolf inspired mask by Ariel D.

Oil Painting by Rachael K.

Tuesday, March 31, 2009

Kim O. finished her African inspired mask. Well done!

Wednesday, March 25, 2009

Observation drawing by Sadie. 18 X 24 with charcoal on newsprint.

Friday, March 20, 2009

Here is the continued progress of a process featured earlier in this blog. The plaster negative, on the left, has been used to make a positive of the student's face. To be continued......
Sterling silver ring by Zack. What is really neat about this ring is the fact that the two top bands rotate freely around the central band.

Thursday, March 19, 2009

Our darkroom is a busy place. Here is an example of an 8x10 print.


Silver, Gold and Sapphire Hollow Ring with a bezel setting. A very challenging and tedious process is well executed here by Katie.

Tuesday, March 17, 2009

Lampworking has quickly become a popular aspect of Crafts classes. 
This piece was made with lead free pewter in our 3-D Arts course. It is about 6 inches tall overall and was accomplished through the lost wax process. It's a very exciting aspect of our curriculum.
An example of student work from our Painting class.
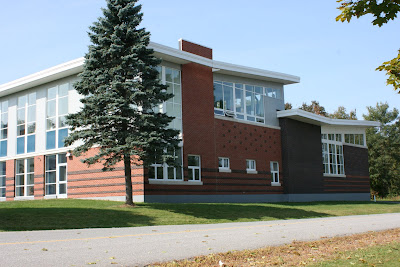
Exterior view of our Fine Arts wing..
This mask, featured earlier, is almost finished. 

Monday, March 16, 2009

A good example of a finished mask using the gauze technique.

Sunday, March 15, 2009

We'll keep coming back to the progress of this project.
Off comes the plaster casting!
Speechless.
The entire face is covered making sure the straws are in proper position the entire time. A pen and paper is a good idea for the one on the table. 

Saturday, March 14, 2009

The "comments" are enabled finally. Sorry about the delay!
This shot shows the perfect consistency of plaster for making the face mold. The helpful hands on the side of her face will aide in keeping the plaster from running and provides a nice thick edge for the mold.
This is another way to make masks. It's a terrific way to get an exact copy of the face. Her face is covered with petroleum jelly, especially the eyelids and brows. 

Wednesday, March 11, 2009

The masks are painted after the final coat of mud is dry. The green mask in this photo has eyes made out of Fimo. The eyes were secured with plastercraft and mud. 
Sheetrock mud is then applied, often several layers, with sanding in between layers. The mud can be watered down and applied with a brush, although most students like the approach of smearing it on with their bare hands. The mud provides wonderful opportunities to give texture to all or parts of the mask.
We then use a combination of cardboard, heavy paper, aluminum foil(my favorite) and tape to sculpt any shape we want. A fresh coat of plastercraft completes the basic shape.
When the mask comes off, it can be trimmed and adjusted with more wet Platercraft (gauze.)
When it dries, overnight, it becomes very strong and light.
We start maskmaking by casting our faces with Plast-R-Craft. We cover the eyebrows and sideburns with paper towel and cover the exposed skin with Lubriderm. (Any skin or face cream will work) The casting material needs to stay on the face for about twenty minutes after the last piece is applied. 

Friday, March 6, 2009

We have gallery space upstairs and downstairs. Both double as hallways. This is a shot of the downstairs gallery space. The wall on the left is in fact curved in both galleries. It gives just a little more room for social gatherings. 

The band room is 48'x48' with a 12-18 ft. ceiling. Acoustically, it's near perfect. The music teacher uses this space daily. It's also utilized by many other facets of the school community as it will hold 150 people comfortably. It's a great performance and lecture space.

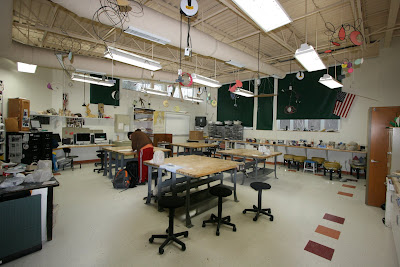
Our 3-D room, with it's sturdy furniture, is capable of taking much use and abuse. Pottery wheels, tools, kilns and 3 sinks, allow students many hands on challenges. 

The Crafts room is equipped with fantastic ventilation, plenty of storage and sinks. Here we teach Crafts and Jewelry/Metalsmithing classes.

This a view of our second floor gallery space. Ample sunlight makes it easy to grow plants. Students can often be found sunning themselves between classes (along with staff.)

Our middle studio hosts Intro to Art as well as Painting and Photography. The gang darkroom, wet lab and laptops, make this a very versatile room.

The small gang darkroom gives students the opportunity to create black and white images. They learn to shoot, develop and print in a very short time.

Wednesday, March 4, 2009

We were fortunate to have Oscar Mokame visit our school recently. He is the founder of the Museum of African Culture in Portland. He performed a "cleansing ritual" to the beat of his drummer. The performance was intense! He also discussed the roles masks and other objects play in African cultures.